English
Appearance
Access URL: https://cloud.kivicube.com/content-editor/index.html
The Content Editor currently supports 3D models and image assets.
Support for AR videos, transparent videos, audio, particle effects, and more asset types will be added in the future.
Tutorial: https://youtu.be/tgWoqBMndYo?si=KWeyHfDaM7H-dVhP&t=82
Q: The model imported into the Content Editor looks different from how it appears in the modeling software
A: This is expected behavior. The Content Editor uses a different renderer and lighting environment compared to modeling software. You will need to adjust materials and configure the lighting environment within the Content Editor.
Q: The model imported into the Content Editor is missing textures
A: Textures may be lost during the conversion process. You can simply reassign the textures to the corresponding materials within the Content Editor.
Q: Model Import Failed
A: %20(1).opngDJHP.png)
Models that do not meet the following requirements cannot be imported into the Content Editor.
Kivicube currently only supports the following extensions:
Info: You can use Photoshop or XnView to export textures in formats such as GIF, TGA, DDS, PSD, TIF, BMP, EXR, HDR, etc. into JPG / JPEG / PNG.
The root bone of the model must not contain animations.
If the root bone has animation data, create an additional empty bone and bind it as the parent to the original root bone.
%20(1).BzJprLMp.png)
%20(1).CMIZvBLG.png)
| Type | Specifications |
|---|---|
| Mesh Count | Severe: ≥ 10 (mesh count too high); Moderately Severe: 5–10; Compliant: ≤ 5 |
| Triangle Count | Severe: ≥6W; Moderately Severe: 3–6W; Compliant: ≤3W |
| Vertex Count | Severe: ≥6W; Moderately Severe: 3–6W; Compliant: ≤3W |
| Material Count | Severe: ≥10; Moderately Severe: 5–10; Compliant: ≤5 |
| Texture Count | Severe: ≥10; Moderately Severe: 5–10; Compliant: ≤5 |
| Animation Count | Severe: ≥10; Moderately Severe: 5–10; Compliant: ≤5 |
| Bone Count | Severe: ≥120; Moderately Severe: 60–120; Compliant: ≤60 |
| Morph Count | Severe: ≥30; Moderately Severe: 0–30; Compliant: ≤10 |
When uploading 3D models through the Content Editor, the system automatically optimizes models based on their source and file format. This helps reduce common issues such as missing textures and incorrect materials, making models work better in AR scenes.
When importing models into Kivicube, we recommend using the GLB format. Click here to learn how to export GLB models from common 3D modeling software.
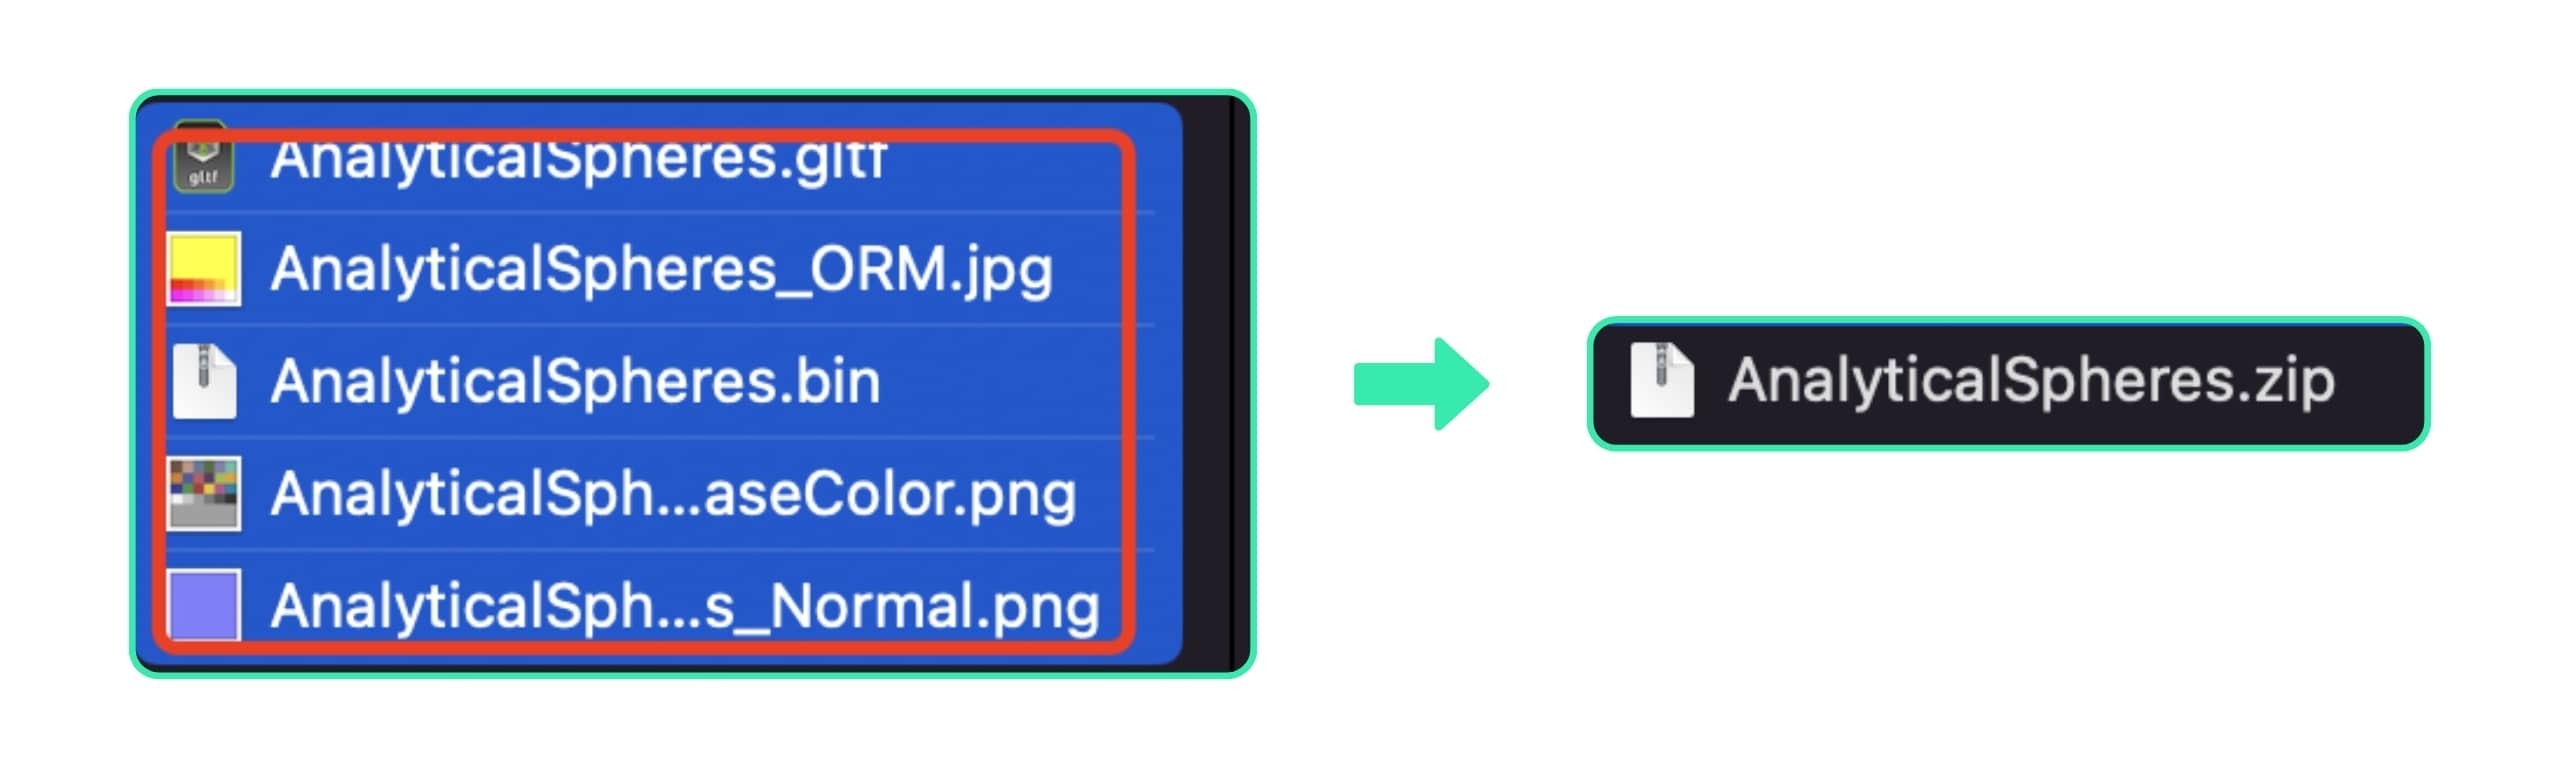
If you cannot get a GLB model, Content Editor also supports importing FBX, OBJ, and GLTF formats. For GLTF files, please compress the .gltf, .bin, and related texture files into a .zip file before uploading.
Since FBX, OBJ, and GLTF formats are more likely to have compatibility issues with textures and materials, we recommend using the GLB format for a more stable import experience.
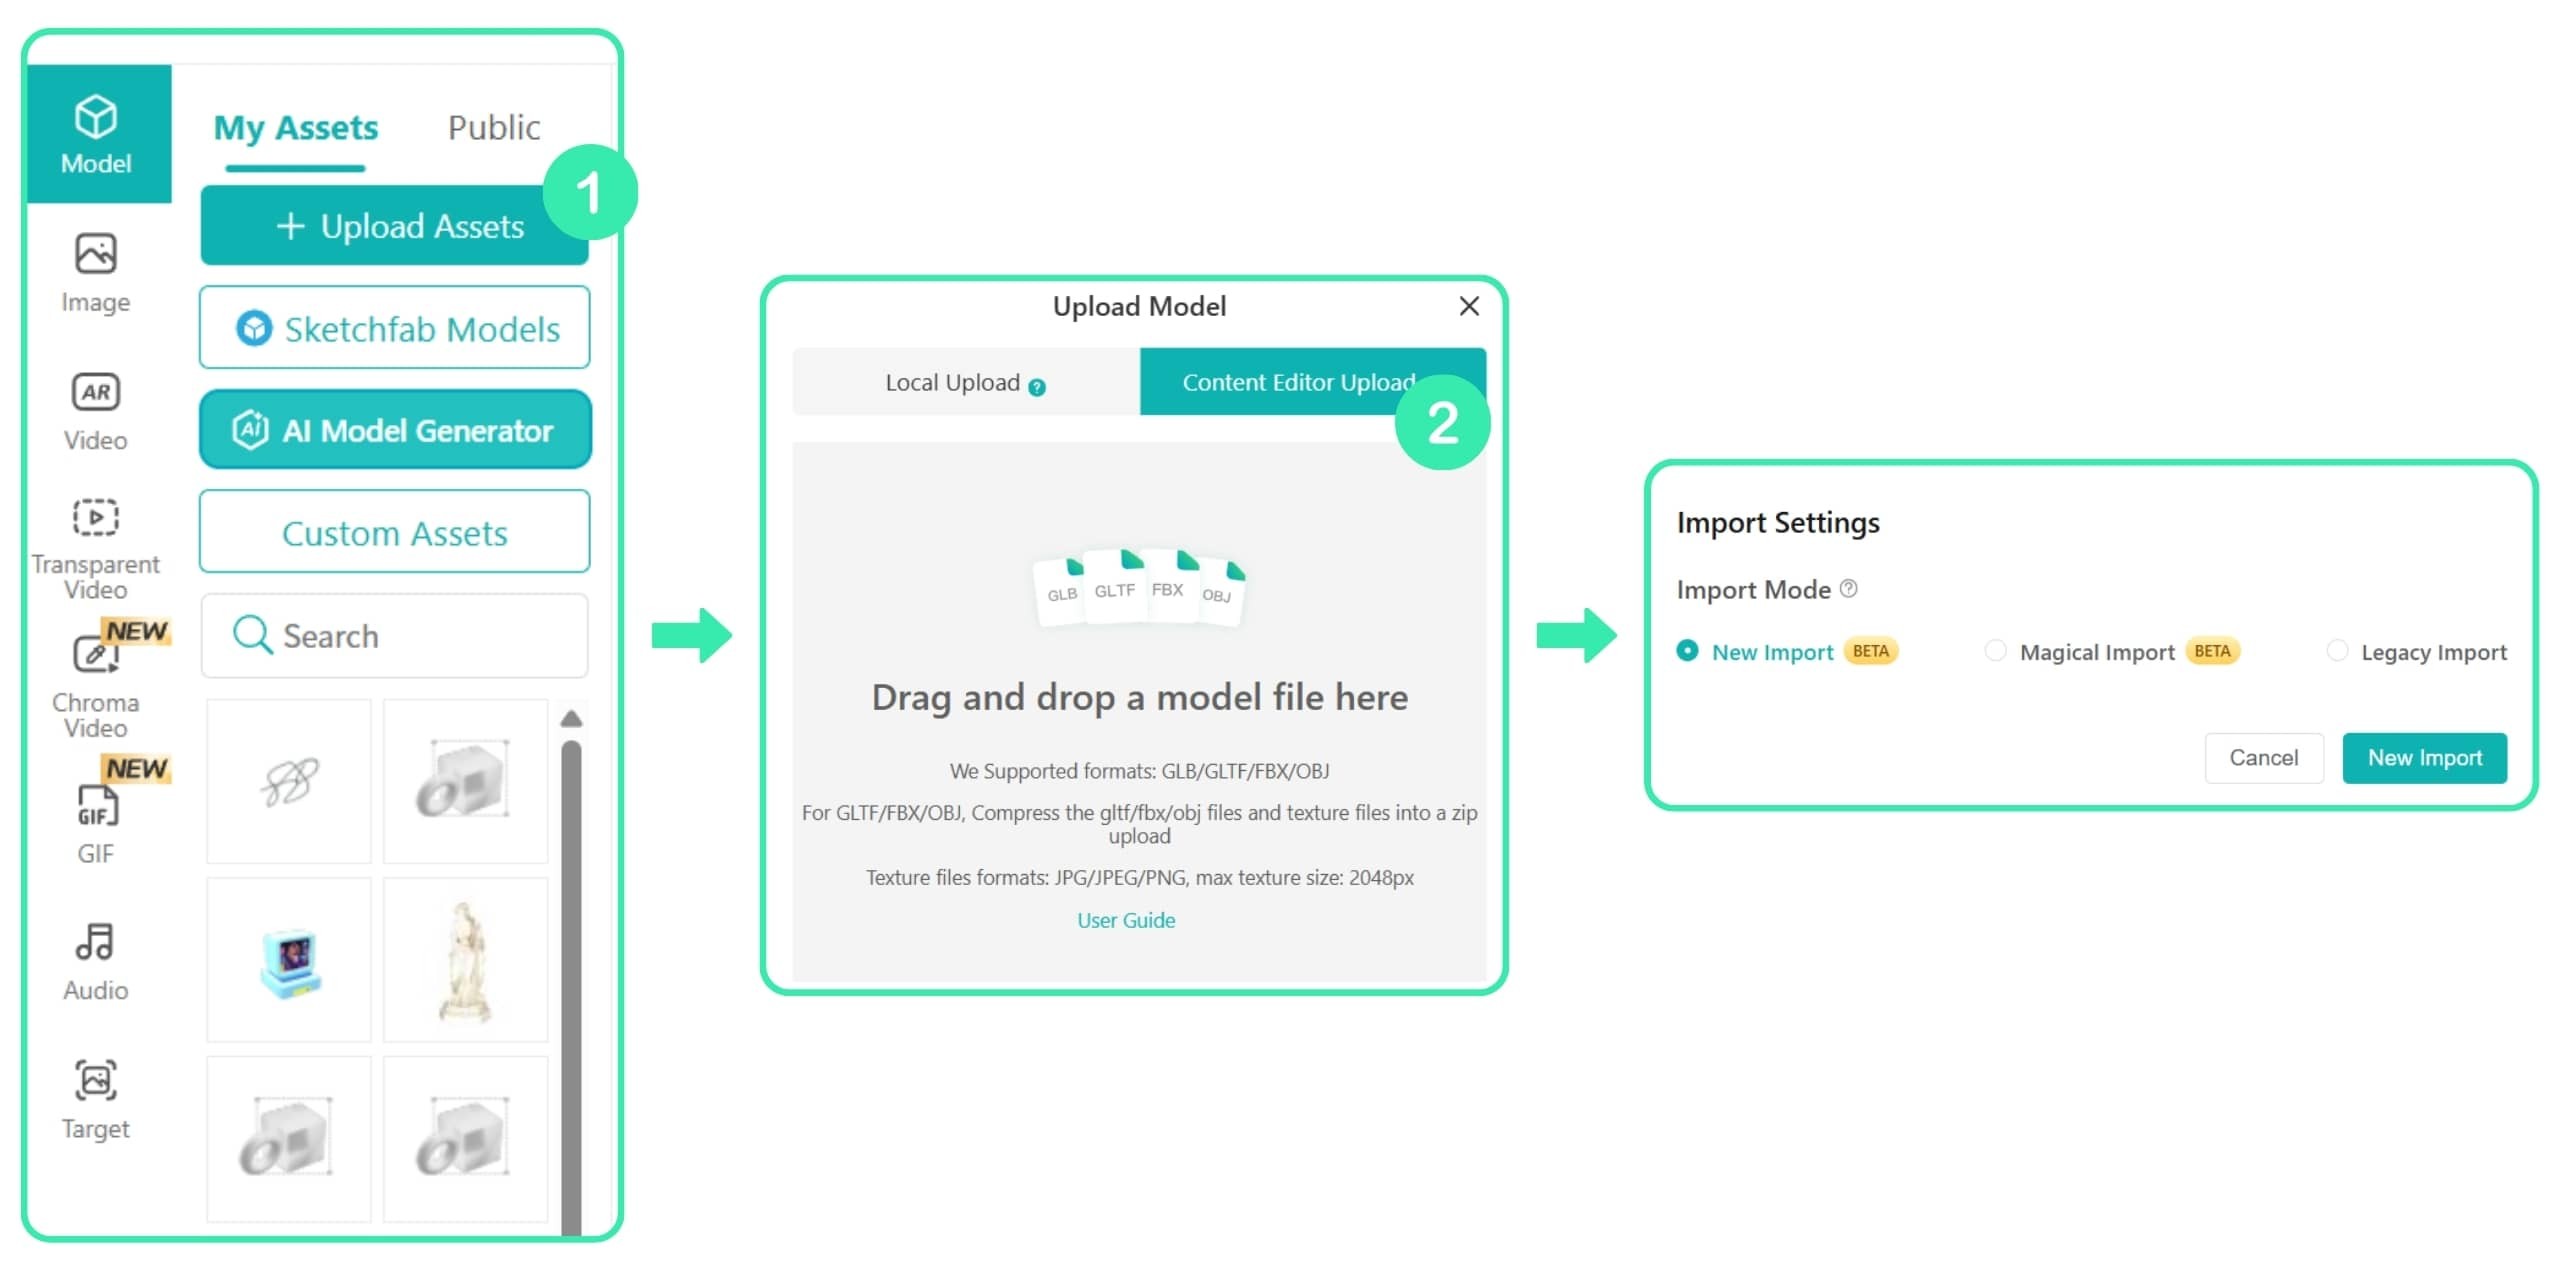
In the Scene Editor, select Model from the Asset Panel on the left, click Upload Asset, and choose Content Editor Upload.
After the model is uploaded, the system provides 3 import modes. For the first attempt, we recommend using the New Import Mode. Once the model is imported successfully, check the model's appearance in the Content Editor.
If the model does not import correctly, repeat the steps above and try another import mode.
If none of the 3 import modes work, please send the model file to our support team at wendell.yang@kivisense.com with a detailed description of the issue. Screenshots or error messages are recommended to help us troubleshoot faster. Our technical team will assist you with the investigation.
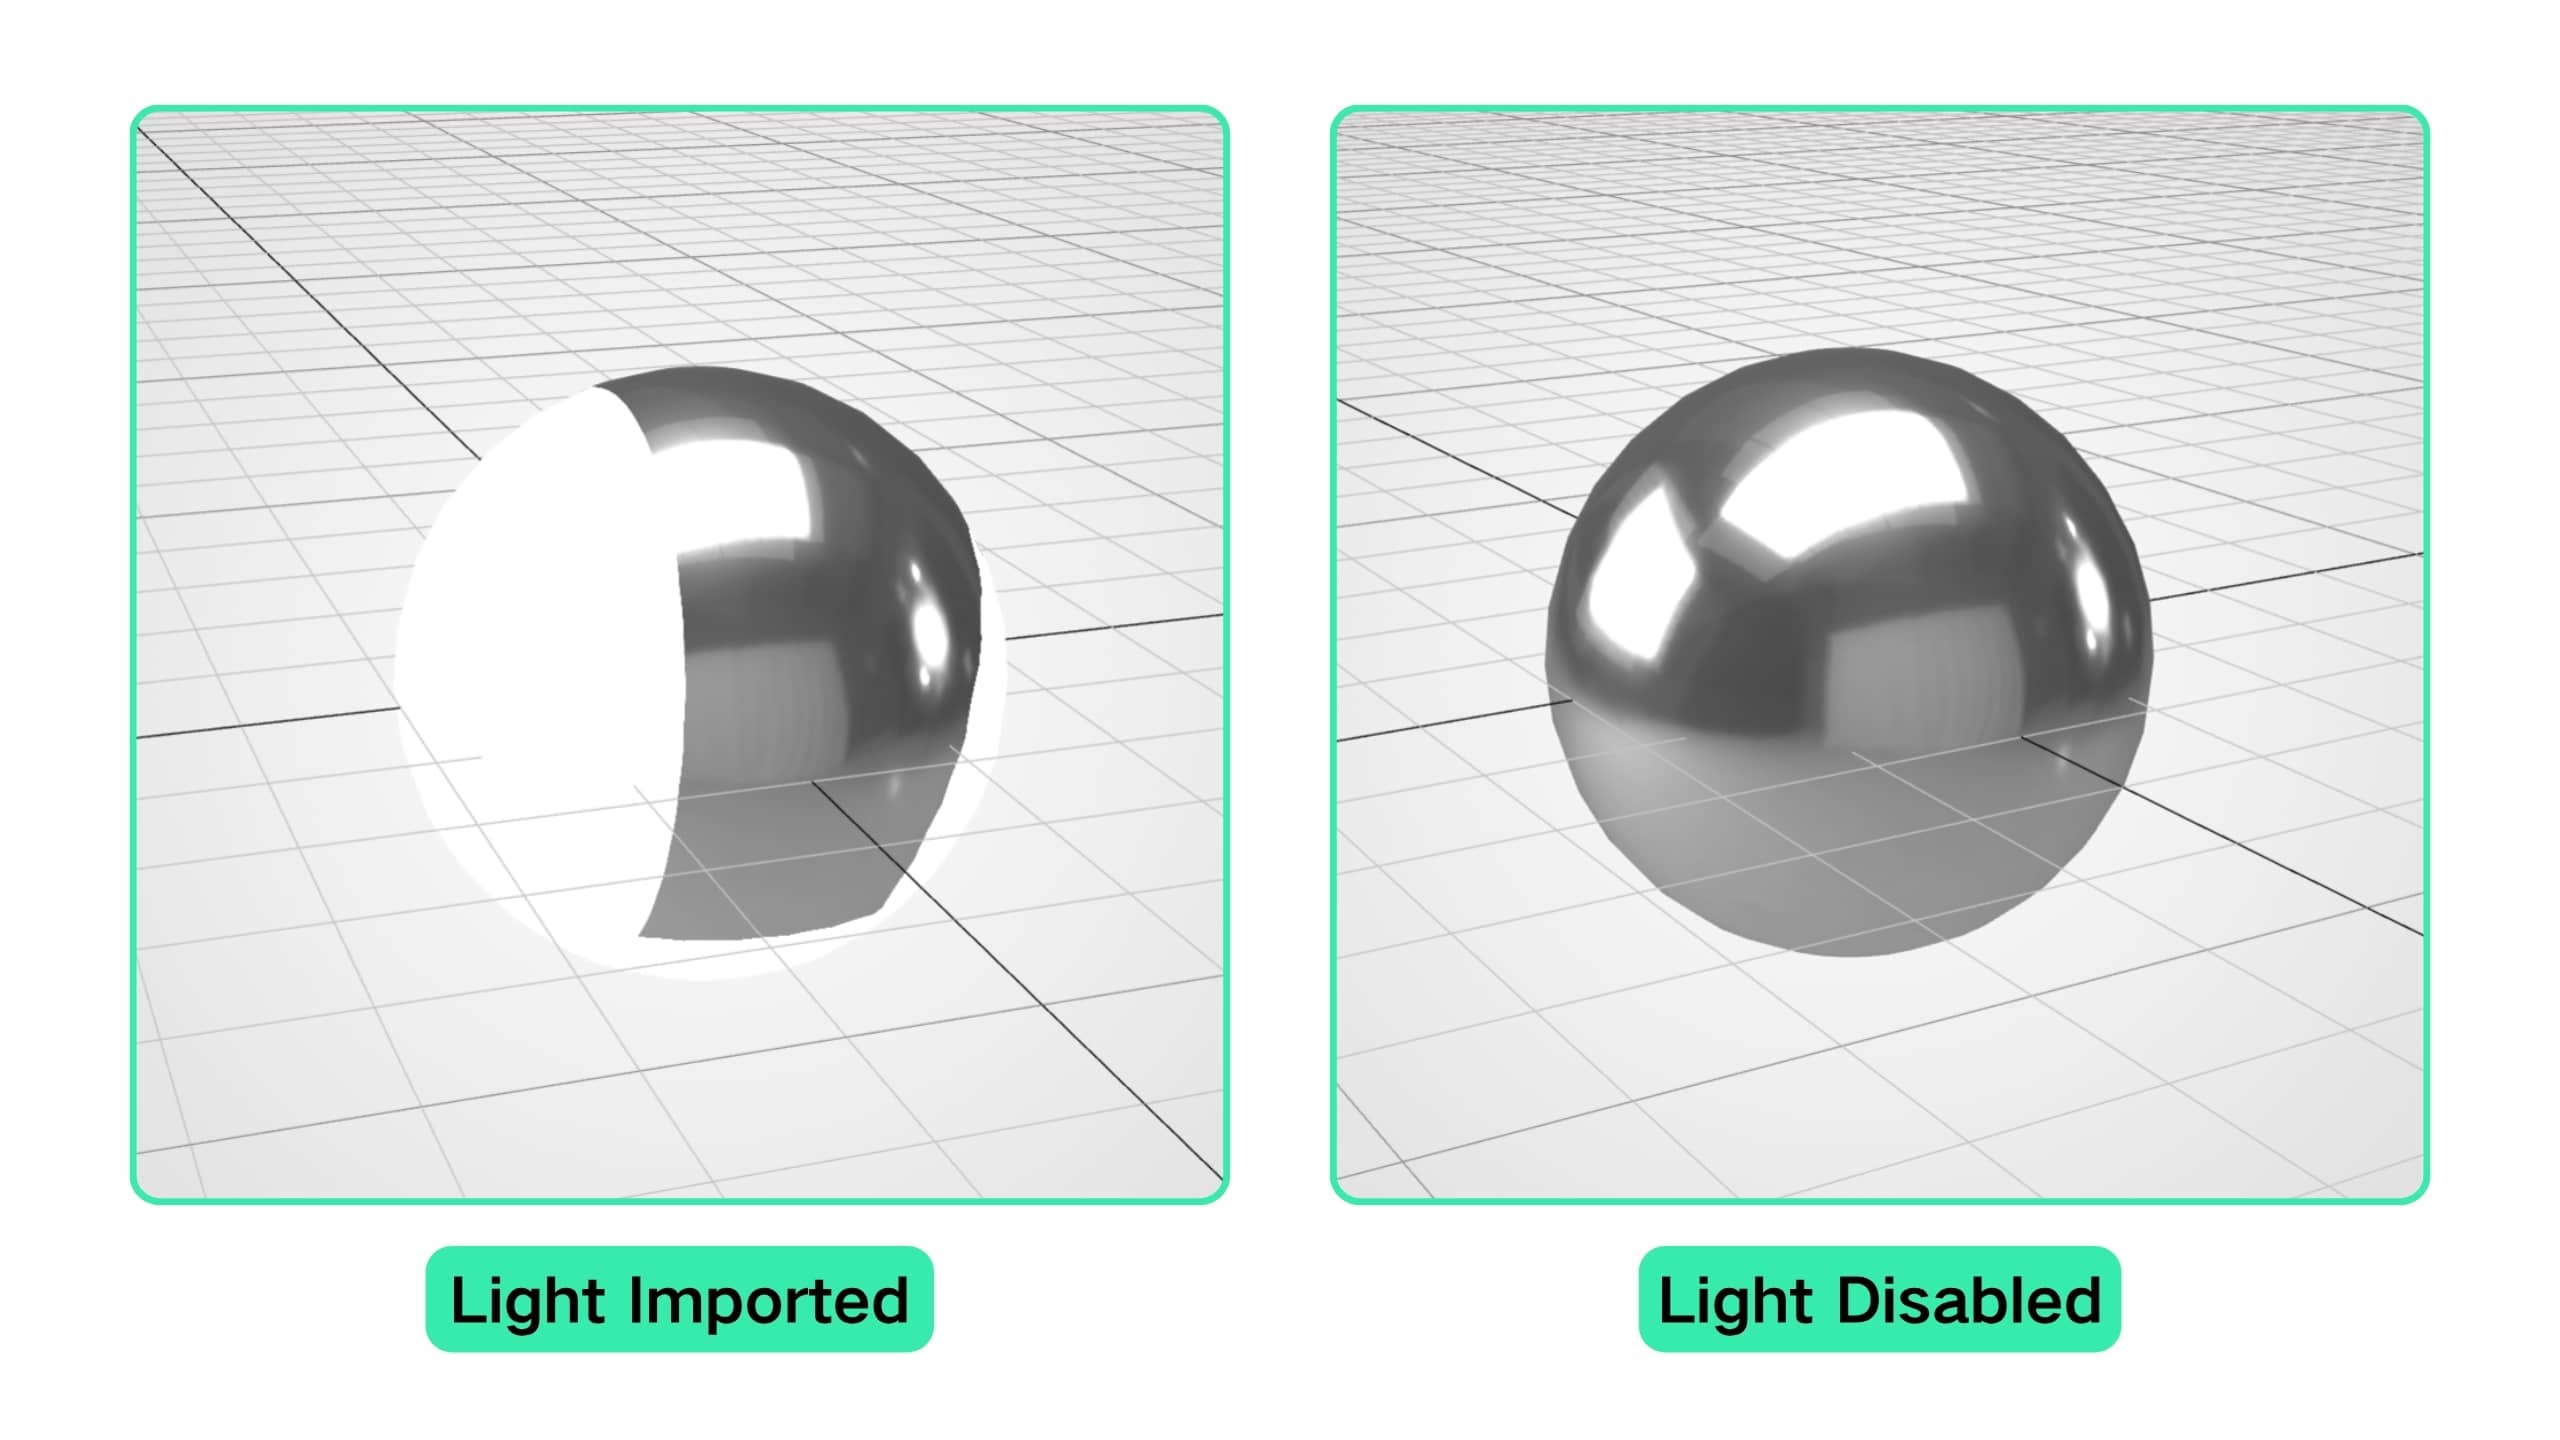
The Scene Editor already provides its own light system. If you also import light from the model, multiple lights may overlap and cause issues such as overexposure or incorrect brightness.
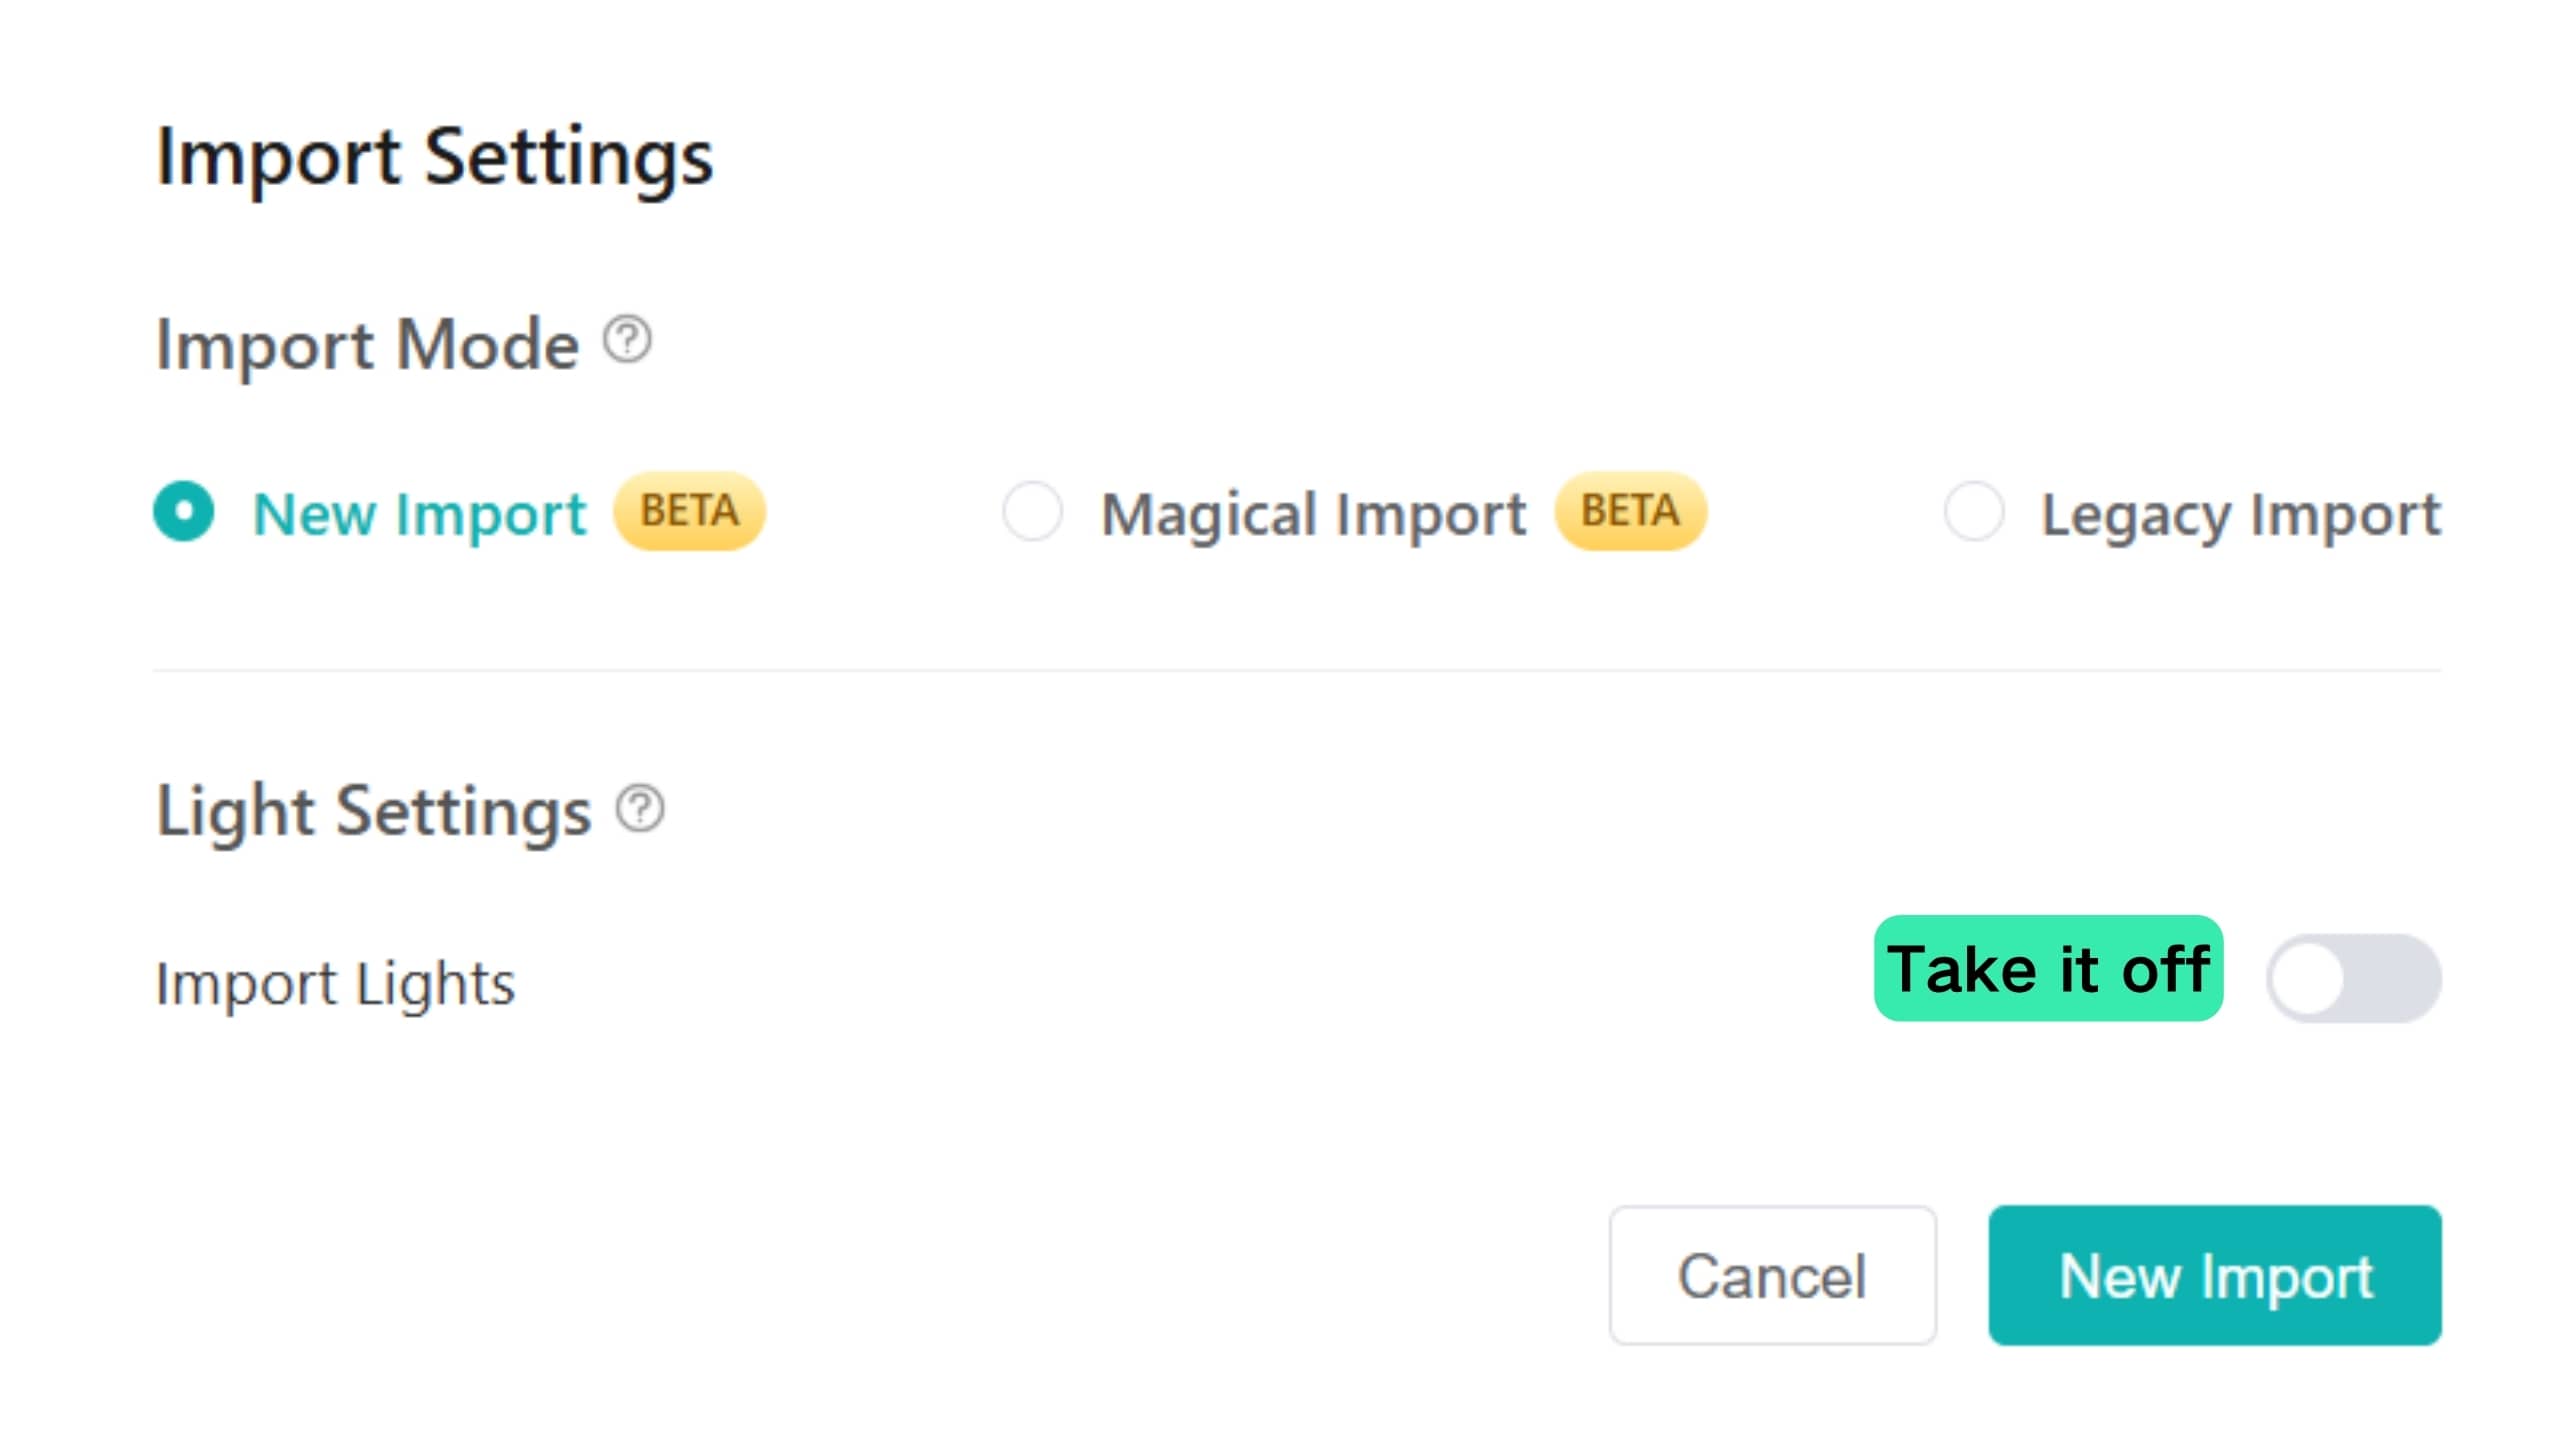
To avoid this, the Content Editor automatically detects whether the model contains light during import. If light is detected, we recommend disabling the light import toggle and adjusting the lighting using the light settings in the Scene Editor.
TIP
For models created with Nomad, we recommend using New Import or Magical Import and choosing not to import model light.
If a model contains both Vertexs Colors and texture, the Vertex Color may override the texture after import, causing the texture to display incorrectly.
To fix this issue, go to Material on the right side of the Content Editor, select the affected material from the Material Name list, and disable Vertex Colors.
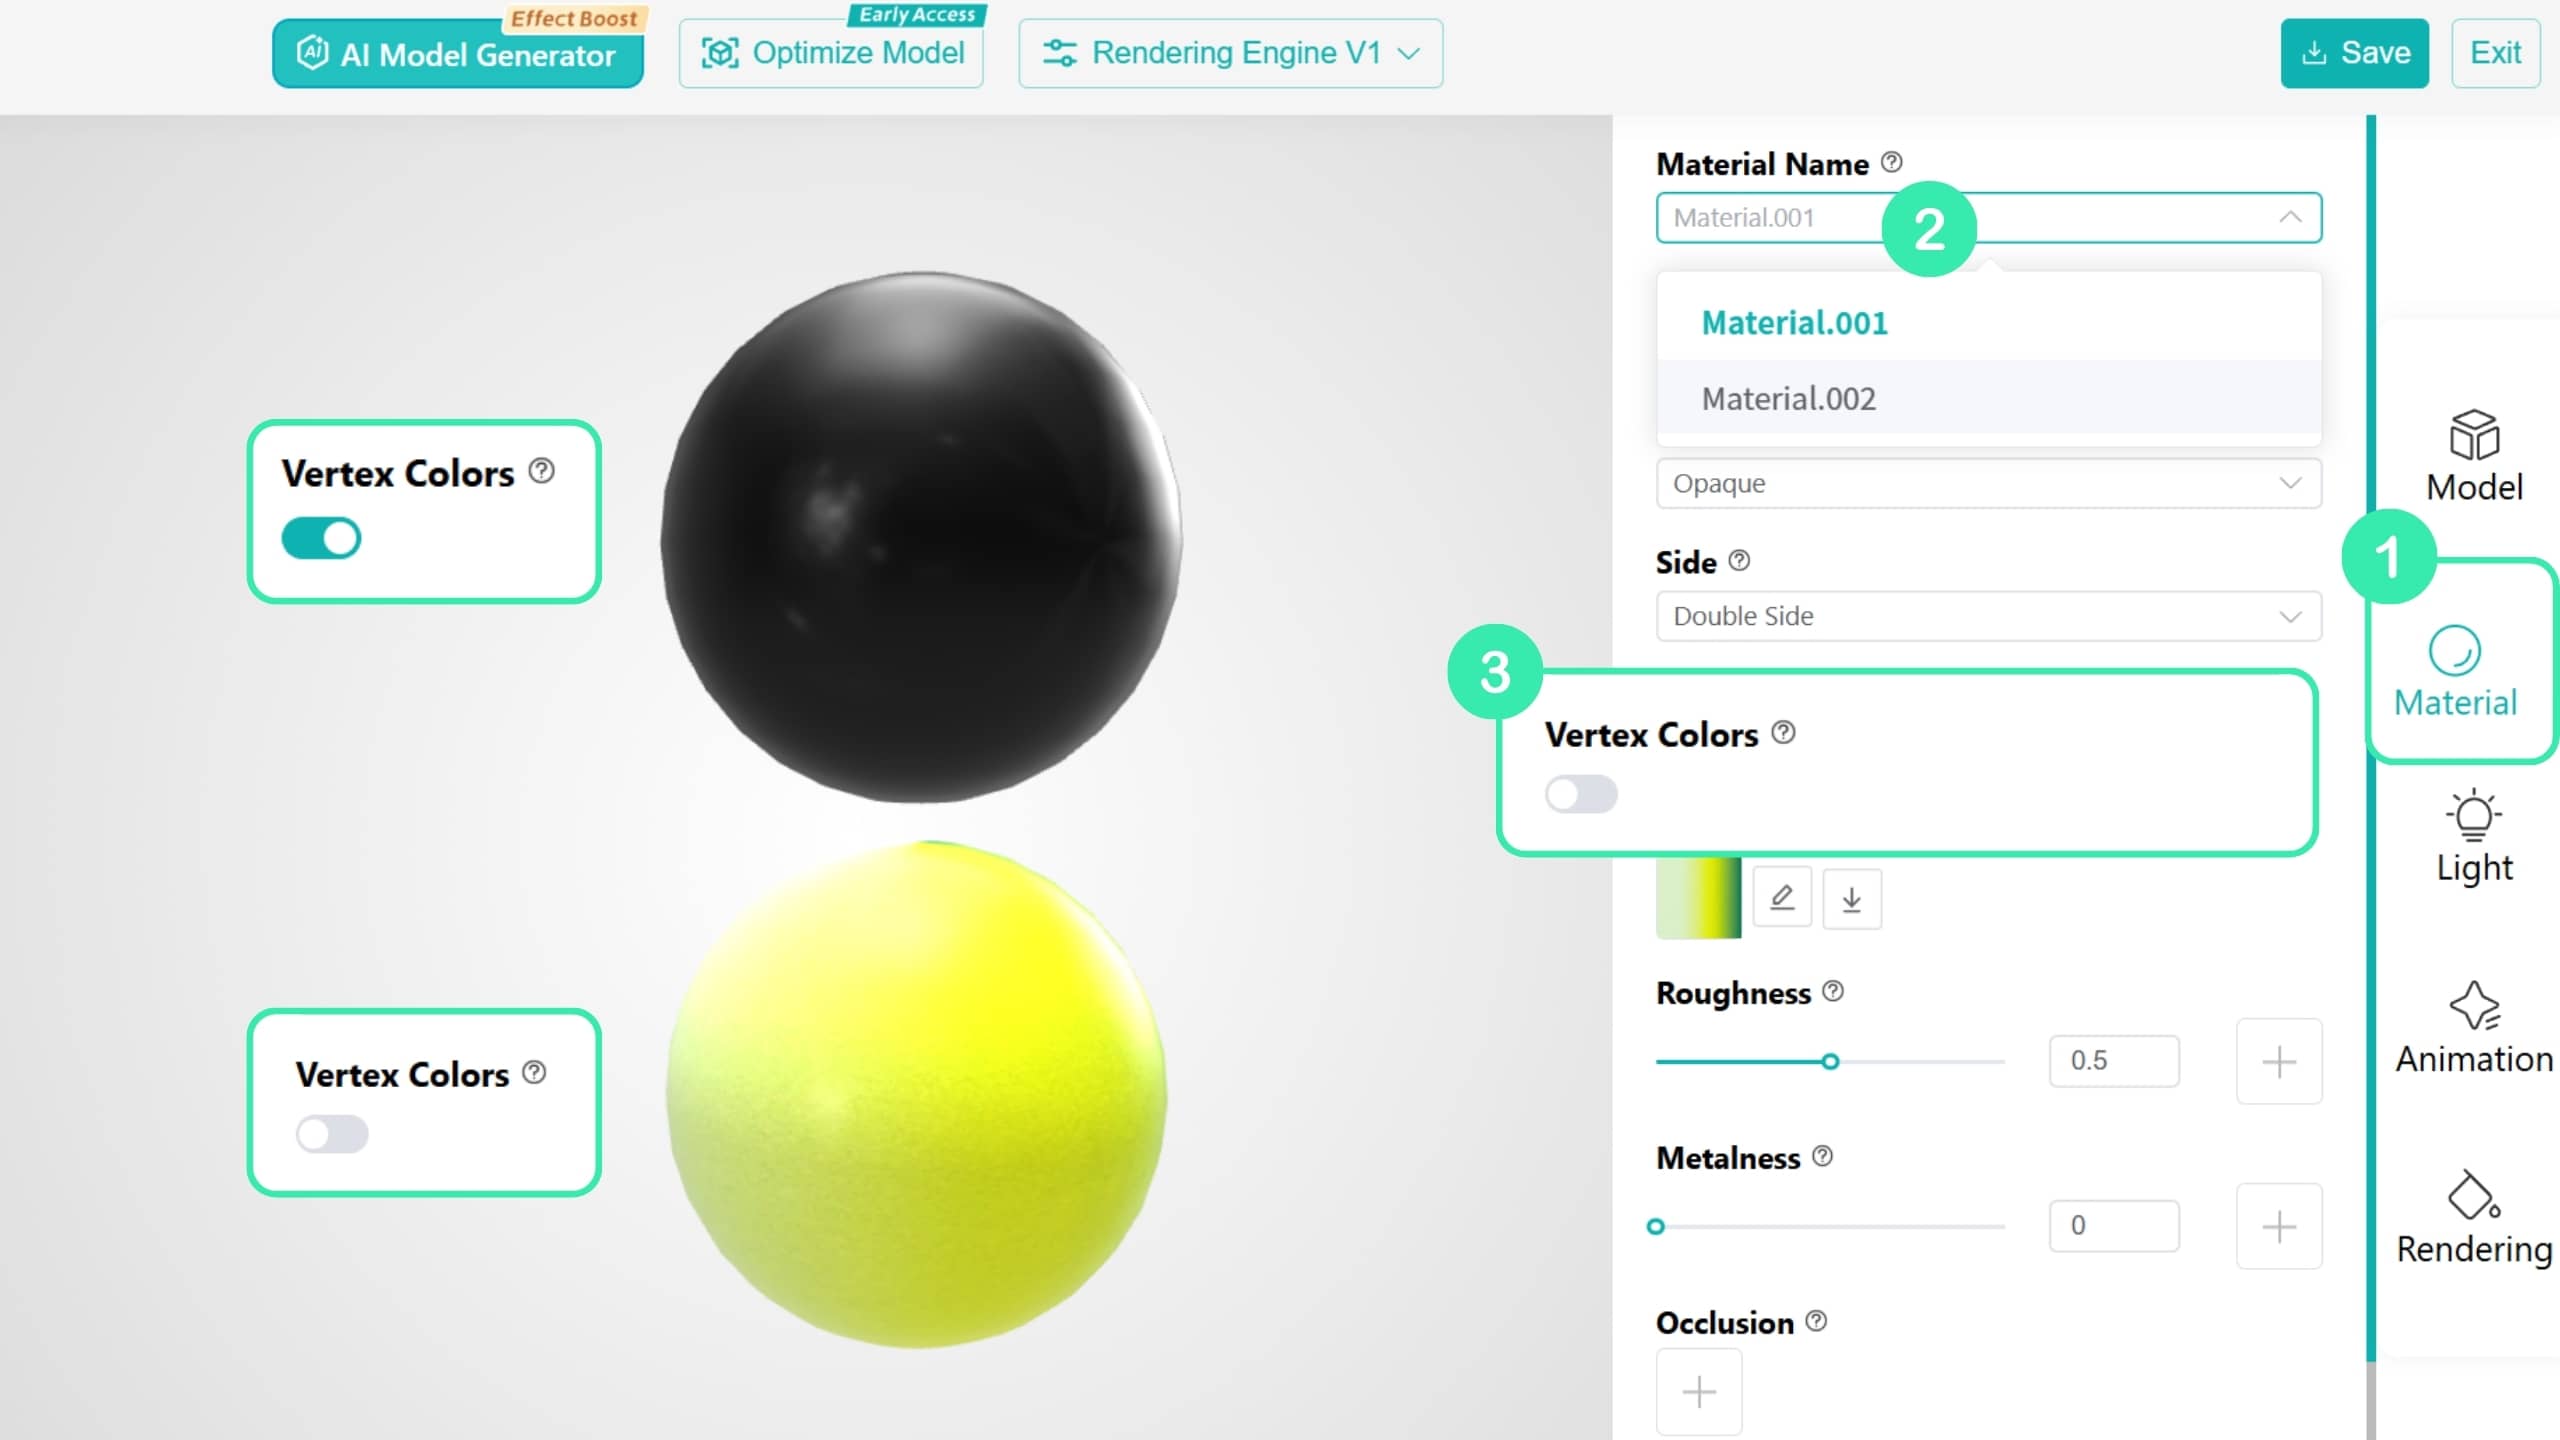
TIP
For models created with Nomad, we recommend using New Import or Magical Import, then disabling Vertex Color for each material.
New Import and Magical Import can automatically detect and merge duplicate textures in a model.
This helps reduce duplicate resources and makes model management easier.
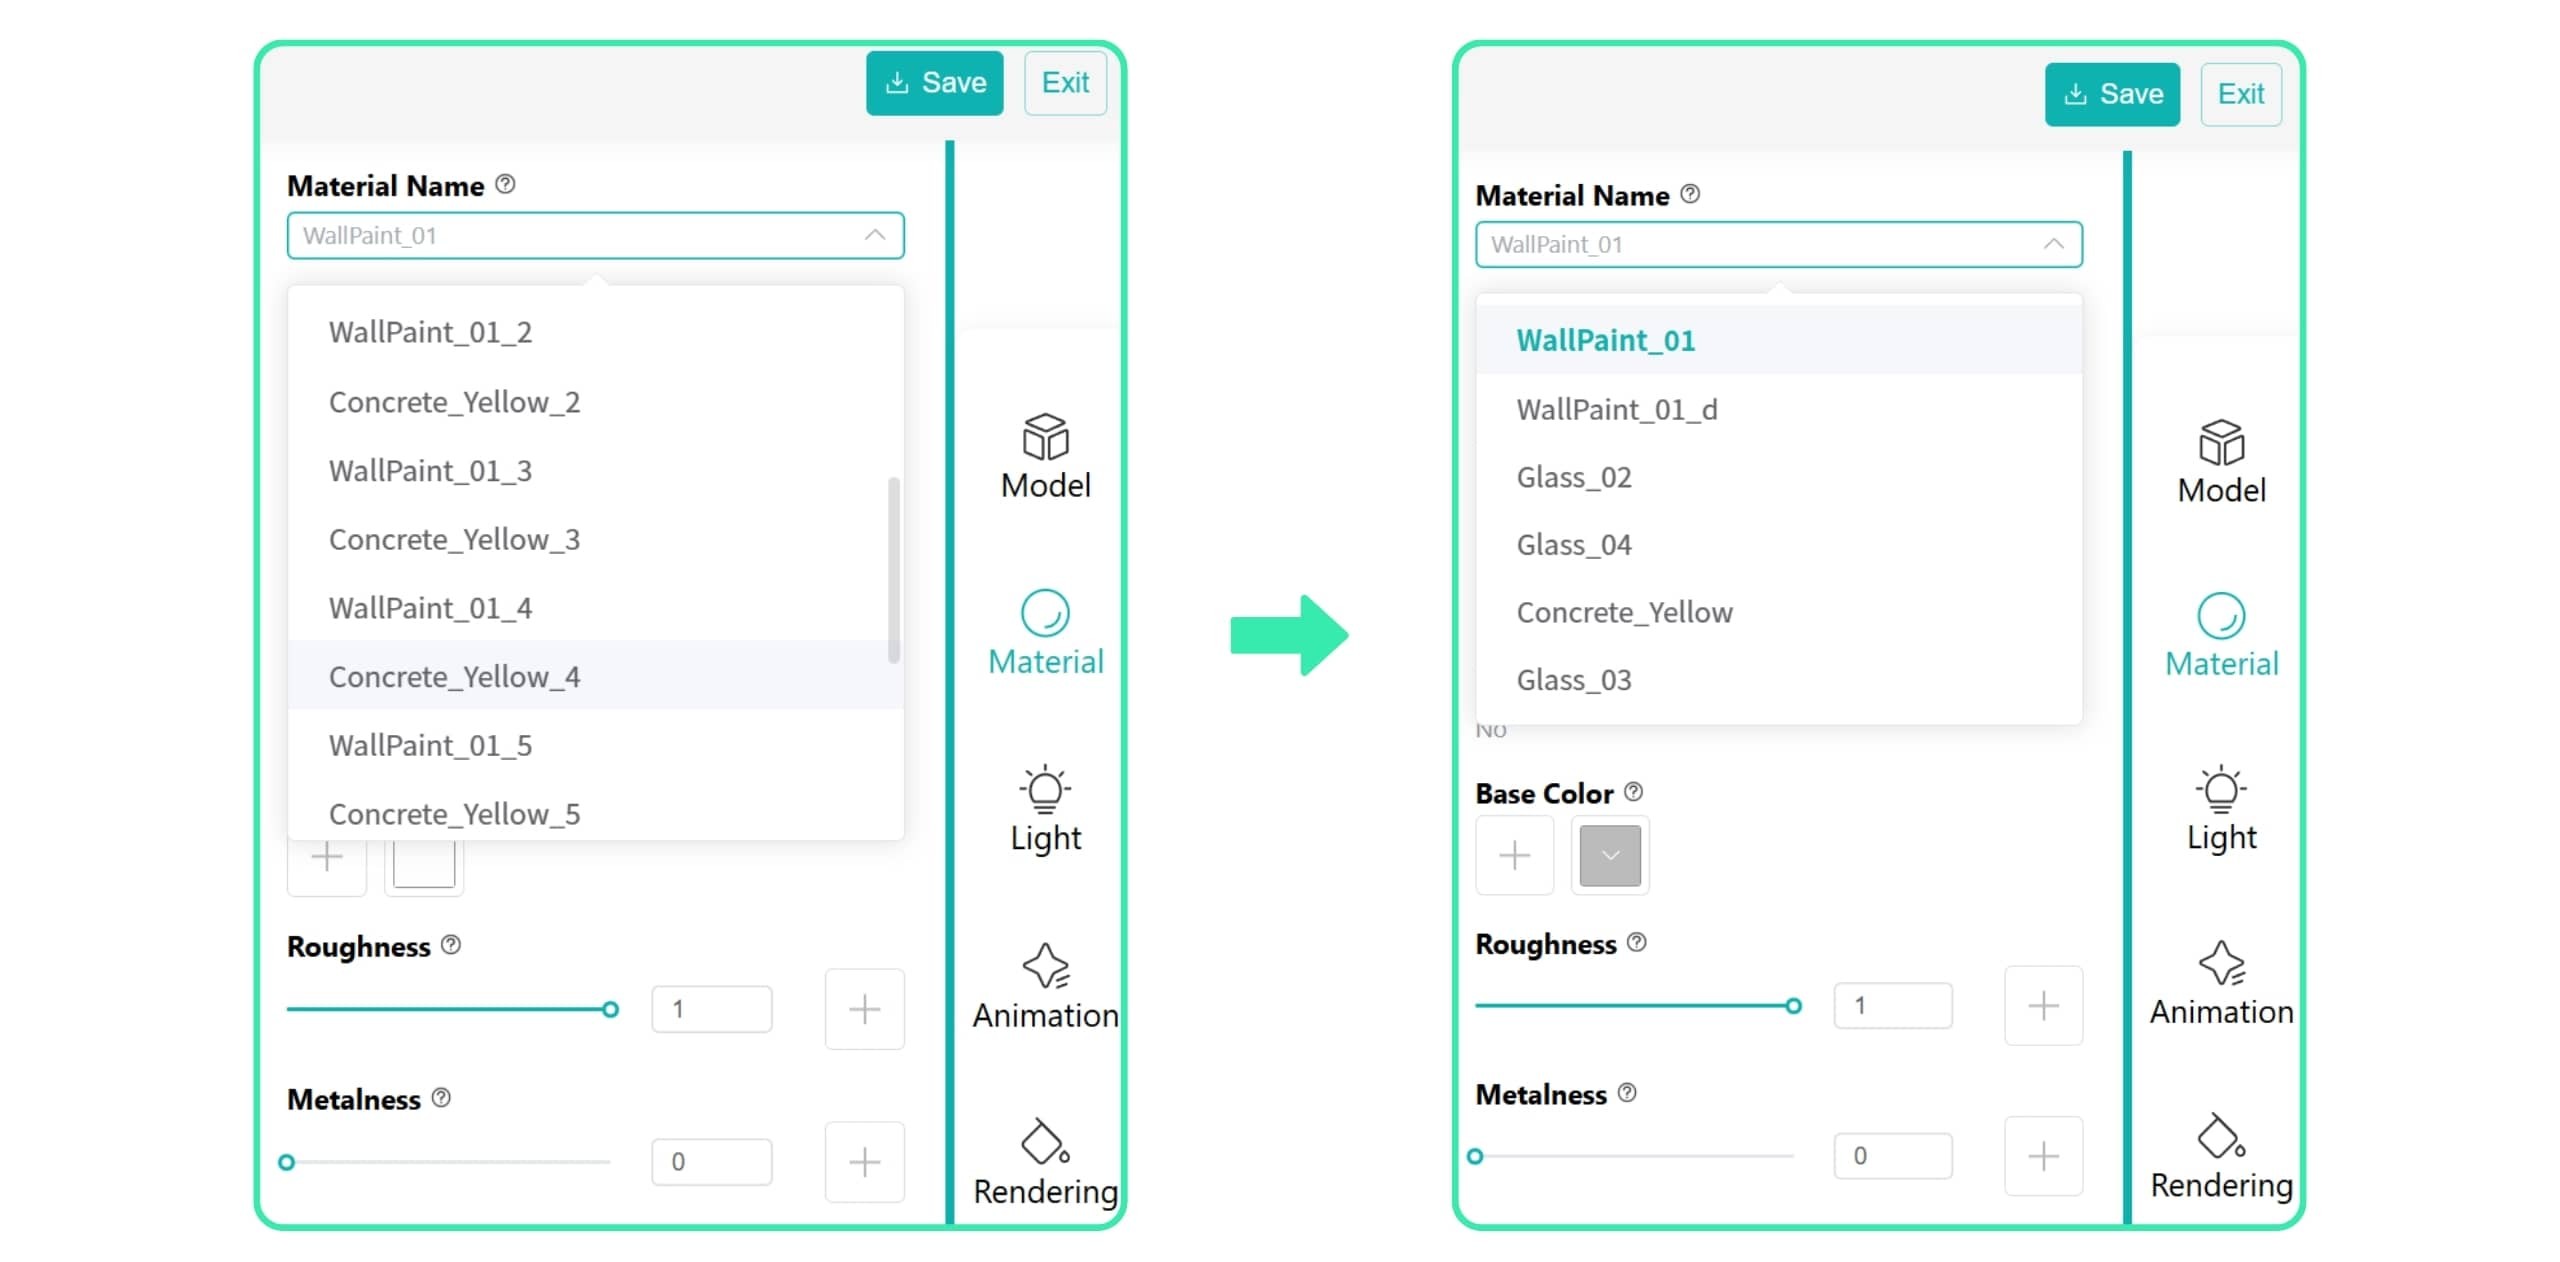
The model is shown as empty during import;
Import fails or causes the webpage to become unresponsive;
The model displays correctly in Content Editor but some materials become abnormal after adding it to the Scene Editor;
Other unexpected model issues.
If you encounter any of these issues, try New Import or Magical Import first.
If the issue persists, import the model into Blender to check whether the model file itself is working properly.
For models with file issues, click here to learn how to export models correctly from common 3D modeling software.
If the model file is working properly, please send the model file to wendell.yang@kivisense.com with a detailed description of the issue. Screenshots or error messages are recommended. Our technical team will help troubleshoot the problem.
Register and Log In to Sketchfab
.wUNhM0H_.png)
.DIWc0h9J.png)
.BJIOJNs5.png)
Note
.BLli3Ulv.png)
%20(10).BRcynH0R.png)
.C5l92VhV.png)
Click the Save button to save the model to your asset library.
.ekPGptaY.png)
| Type | Saving Condition |
|---|---|
| Model Materials | When saving, the material settings are written directly into the model. This means the version stored in the asset library will include the updated materials. .BIGESE2N.png) |
| Lighting | Lighting adjustments are for preview purposes only. You will need to reconfigure again in the Scene Editor. .Dh-GcPQg.png) |
| Rendering | Render adjustments are for preview purposes only. You will need to reconfigure again in the Scene Editor. .CLj4qysP.png) |
| Model Display Setting | Model display settings are for preview purposes only. You will need to reconfigure again in the Scene Editor. .CwD8yKO5.png) |
Be sure to use the Model Properties panel to verify that the model meets all required specifications.
.DWZLw3no.png)
File: Identifies which software was used to export the current model
Size: Models with a longest edge greater than 200 m will be automatically scaled down to 100 m upon import
glTF Extensions: Currently, only the following extensions are supported:
If any required extensions appear outside this list, the model may fail to load or render incorrectly.
.-Ni42kCs.png)
After clicking Save, none of the settings in Display Settings will be saved. You will need to reconfigure these settings in the Scene Editor.
.KEiQtdD4.png)
A model may contain multiple materials, so be sure to configure each material properly.
After importing a model into the Content Editor, it is common to encounter missing texture maps.
Simply select the corresponding material and reassign the textures as needed.
.CBo33rHr.png)
%20(3).DzM-sU4R.png)
Material Types
.BzNDDP2Q.png)
Alpha Mode
| Type | |
|---|---|
Opaque .6CafoKiz.png) | - If you need a material to be non-transparent, set its transparency mode to Opaque. |
Transparent / Semi-Transparent (BLEND) .DWVHSy09.png) | - If a material contains semi-transparency, set its transparency mode to Blend. |
Transparent MASK .DX_mgfTe.png) | - If a material contains transparency but no semi-transparency (for example, leaves), set the transparency mode to MASK. - When the texture’s alpha value is greater than or equal to the Alpha Cutoff, the pixel will be rendered as opaque. When the alpha value is below the Alpha Cutoff, the pixel will be rendered as fully transparent. .UngrgA0B.png) .CIYSo-vT.png) |
Side
Enabling double-sided rendering will increase performance costs. Please avoid enabling it unless absolutely necessary.
Material Property Settings
| Property | Illustration | Description |
|---|---|---|
| Base Color | .Dt9OpQI3.png) | 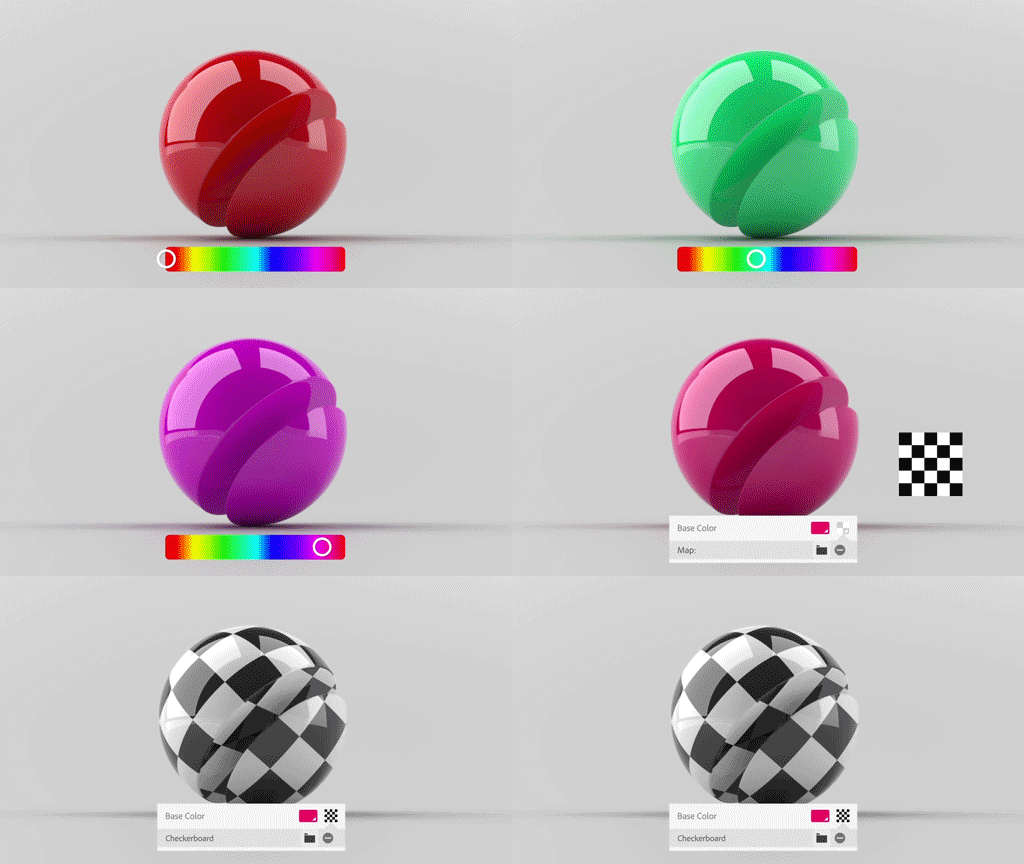 Add a color map to the model or set the color directly |
| Roughness/Metalness | .CqPkipoM.png) | Roughness controls how rough or smooth the model’s surface appears.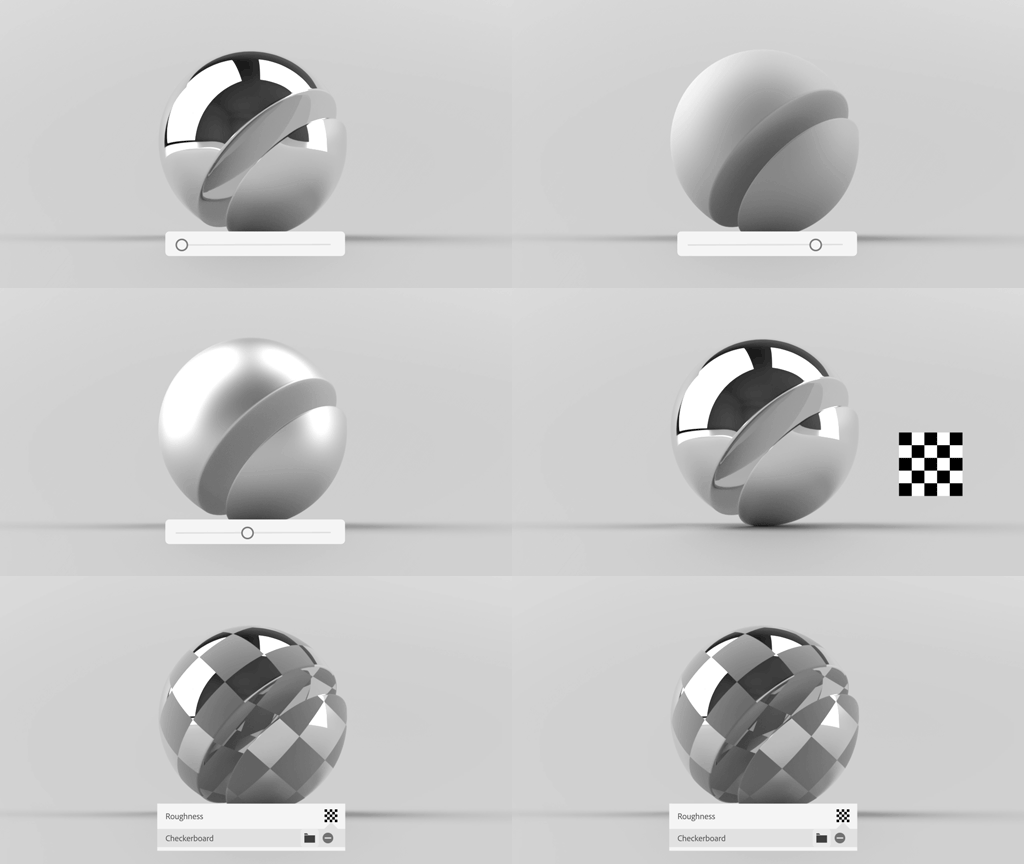 - A lower roughness value results in a smoother surface, while a higher roughness value makes the surface more rough. - A roughness map controls the roughness at different areas of the model, allowing some regions to appear smooth while others appear rough. Metalness / Metallic Glossiness controls the metallic appearance of the model. 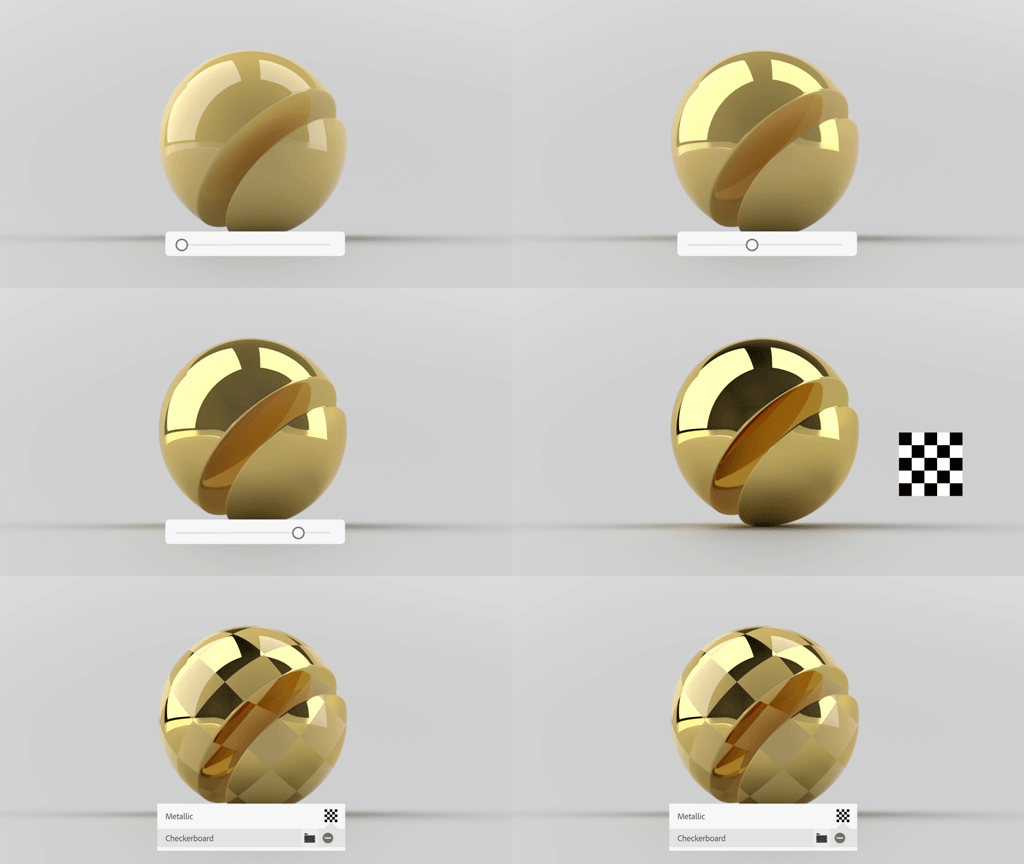 - The higher the metalness value, the more metallic the surface appears. - A metalness map controls the metalness level at different areas of the model, allowing some parts to appear more metallic while others remain non-metallic. |
| Occlusion | .CJggr01p.png) | Ambient Occlusion (AO) adds shadow detail to a model. Sometimes, to reduce the number of texture maps, shadow details are baked directly into the base color texture. From a PBR rendering perspective, this is technically not recommended, but in practice it can be used when appropriate. |
| Emissive |  | Add an emissive map to the model or directly set an emissive color. |
| Normal | .XiKJeJhC.png) | A normal map is used to add surface detail to a model. |
Texture Formats
Only jpg / jpeg / png are supported. Use png for transparent textures.
| Original Format | Converting Method |
|---|---|
| gif / tga / dds / psd / tif / bmp / exr / hdr | Use Photoshop or XnView to export the textures as PNG or JPG. |
Texture Size and Compression
.VulIYrGq.png)
Q: The bounding box does not fit the model
A: Symptom:
After importing the model into the Content Editor, the model’s position does not match the bounding box.
This is caused by bounding box alignment issues. We recommend adjusting the bounding box directly in your modeling software.
If the model is only intended for use on the platform, you can use our model compression tool to correct the issue.
Q: The Content Editor shows a popup message: “imageLoader onimageError”
A: Refer to “Texture size limit / Unsupported texture formats.” If the texture size is too large, please compress it.